Please select an article from the left menu to display its content.
Document Workspace is where you create, edit, send, share, and track every document in LogixDocs. Every document you create — whether from a blank template or one linked to a shipment or other record — lives here, organized by status.
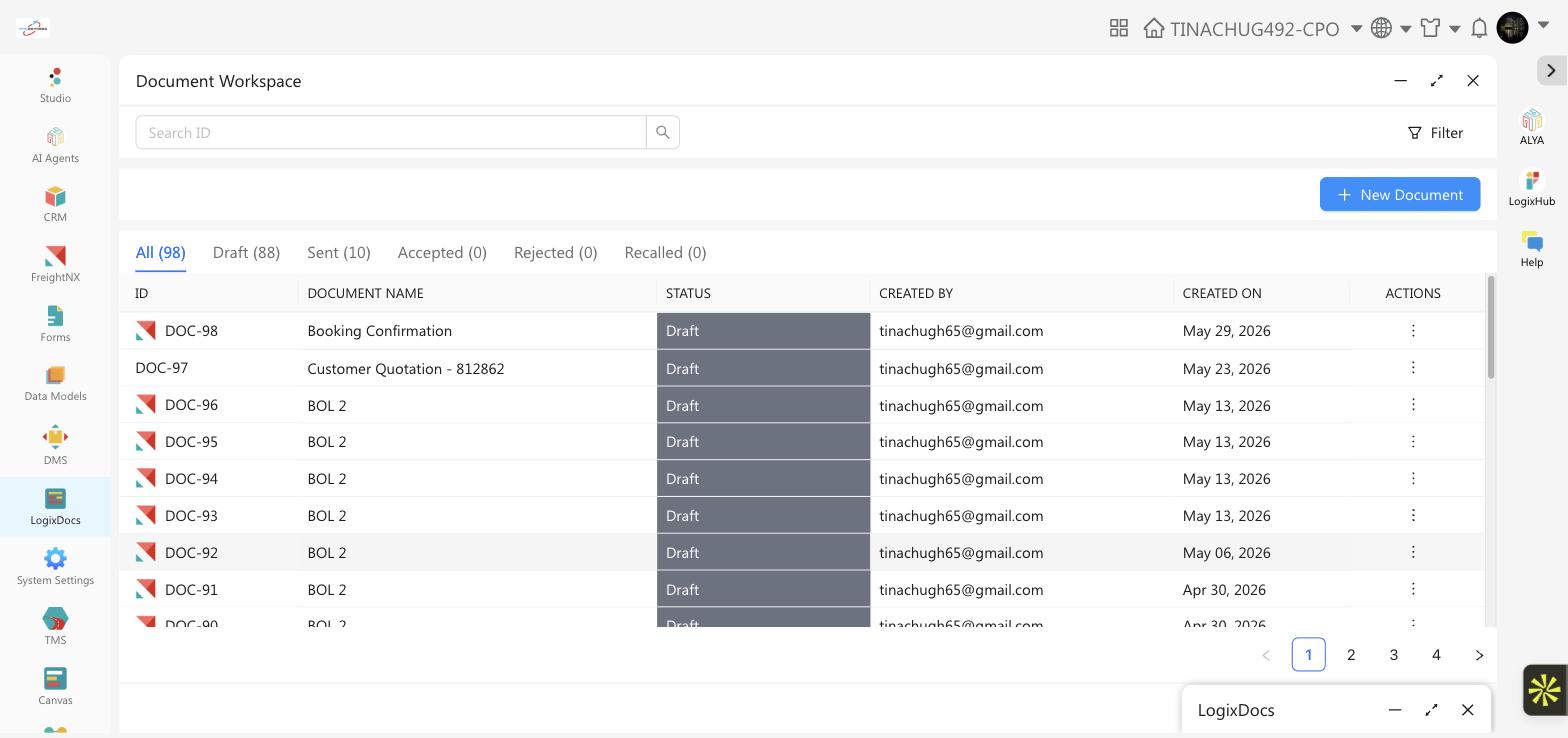
Finding a document
- Status tabs — All, Draft, Sent, Accepted, Rejected, and Recalled, each showing a live count.
- Search ID — search for a document by its ID (for example, DOC-98).
- Filter — narrow the list by Document Name, Created On date, or Linked System (the module the document is connected to, such as FreightNX).
Creating a document
Click + New Document.
In the box that appears, select a template from the Select Template list, then click Create.
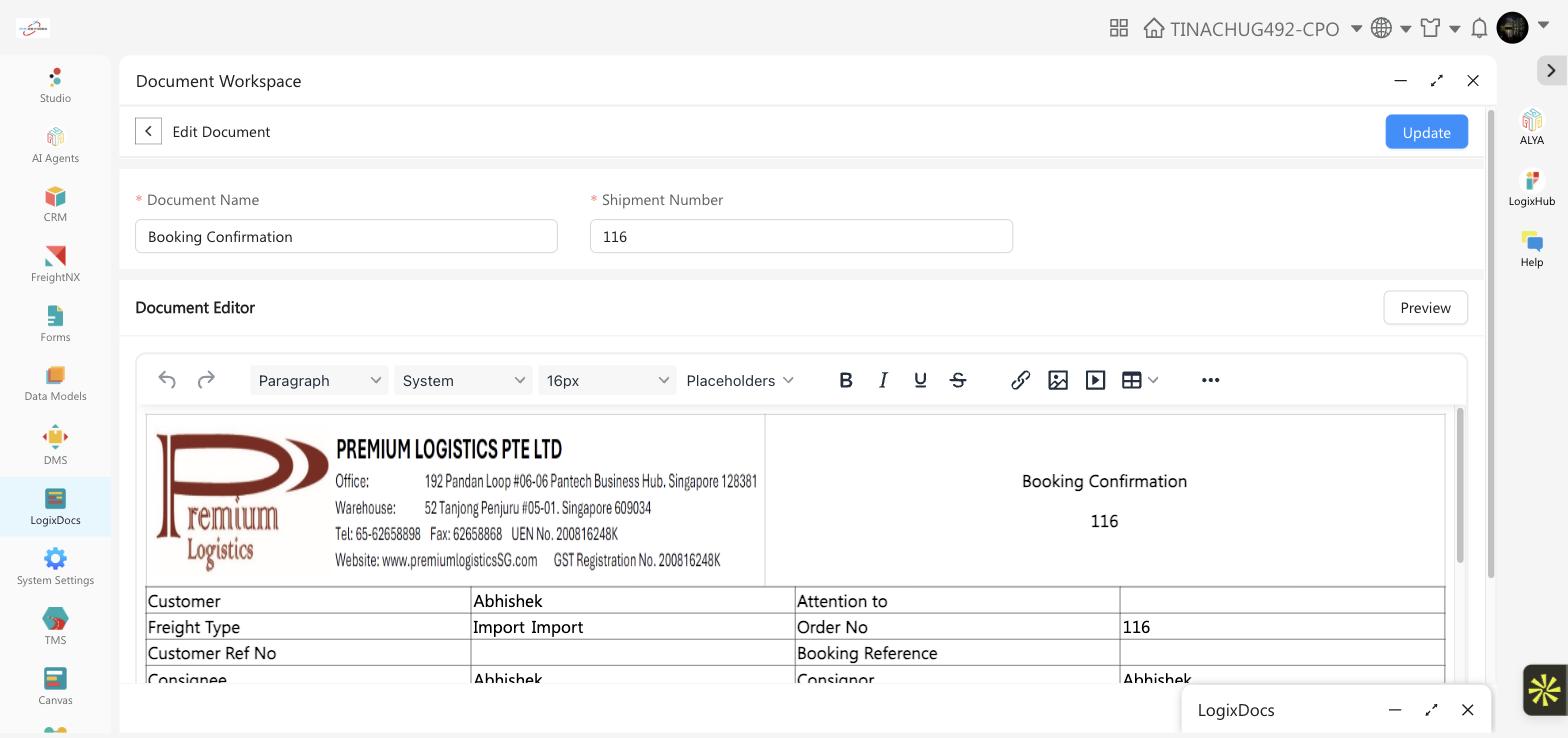
Enter a Document Name. If the template is linked to another module, a second required field appears — for example, Shipment Number for a FreightNX-linked template — search for and select the record to link.
Edit the document body in the editor. Templates come pre-filled with merge fields shown in double curly braces, such as
{{Shipment Number}}or{{Consignor Name}}, which are replaced automatically with data from the record you linked. Use the Placeholders menu in the toolbar to insert additional merge fields as you edit.To insert a table populated from another Custom App's data, right-click any table in the editor and choose Filters. In the Insert Dynamic List Table dialog, pick a Data Source (the Custom App and form to pull the data from) and the Columns to show, optionally add one or more Filters to narrow which records appear, then click Insert Table.
Click Preview to see how the document will look, then choose how to proceed:
- Save — keeps the document as a Draft so you can finish it later.
- Save & Send Document — saves the document and immediately emails it to a recipient.
- Use the dropdown beside Save & Send Document for Share Link (a shareable view link) or Share PDF instead.
Managing an existing document
Open the actions menu at the end of any row. The options shown depend on the document's status:
| Status | Available actions |
|---|---|
| Draft | Download, Edit, Share Link, Share PDF, View |
| Sent | Download, View, and Copy Link if it was shared by link |
Good to know
- A document only shows a required linked-record field, such as Shipment Number, if its template was designed to connect to that module — not every template needs one.
- Recalling a sent document removes the recipient's access to it and moves it to the Recalled tab; the recipient can no longer accept or reject it.
- You don't have to create every document by hand: add a Create LogixDocs action to a Studio app's Automation rule and choose one of that app's LogixDocs templates. When the automation's trigger fires, the system creates the document and fills in the template's placeholders with that record's values automatically — for example, generating a Booking Confirmation the moment a new FreightNX Shipment is created. See Studio: Automation for details.