Please select an article from the left menu to display its content.
A Shipment in DMS is a last-mile delivery job — a single pickup-to-drop-off order for a retailer, a courier partner, or any business that needs goods delivered to a final address. Before a delivery can be planned, it has to exist in the system as a shipment record. You can add shipments one at a time through a form, or upload many at once from an Excel file. Once shipments are in the system, they become available on the Delivery screen, where they can be assigned to a vehicle and driver manually or allocated automatically.
Getting to Shipment
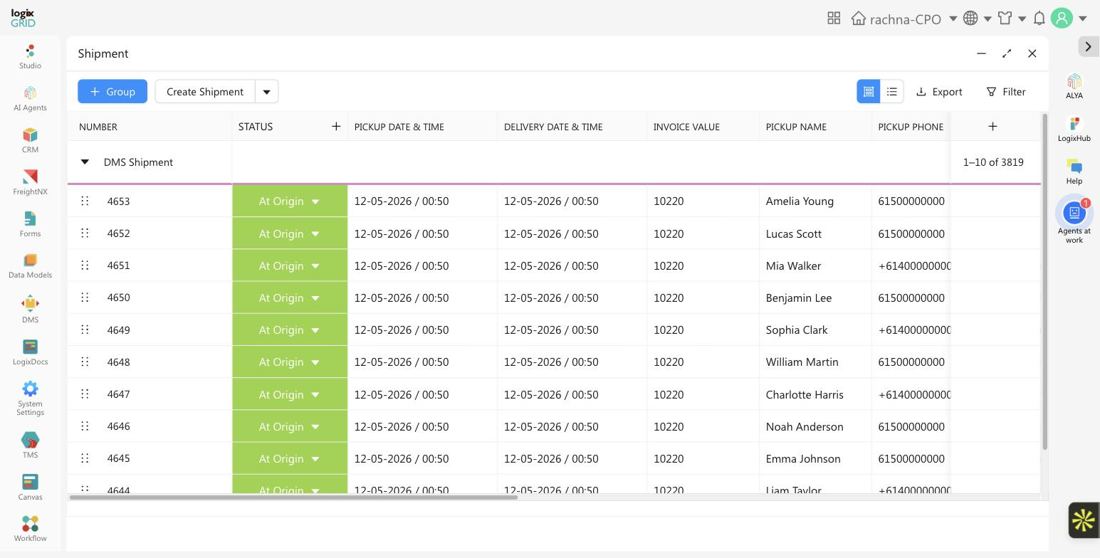
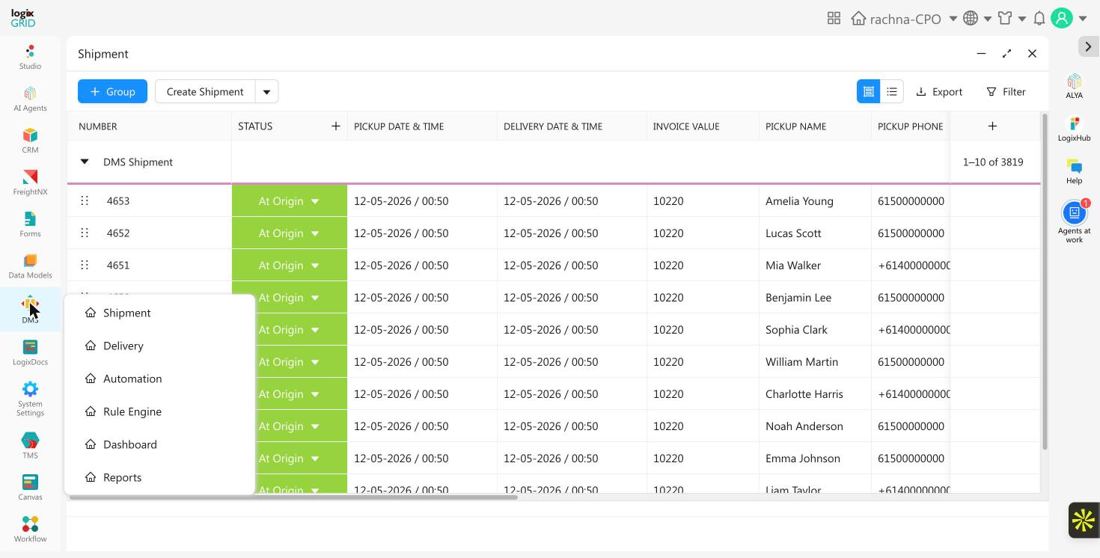
- In the left sidebar, click DMS. A popup opens with the DMS screens.
- Click Shipment. LogixFlow opens the shipment list.
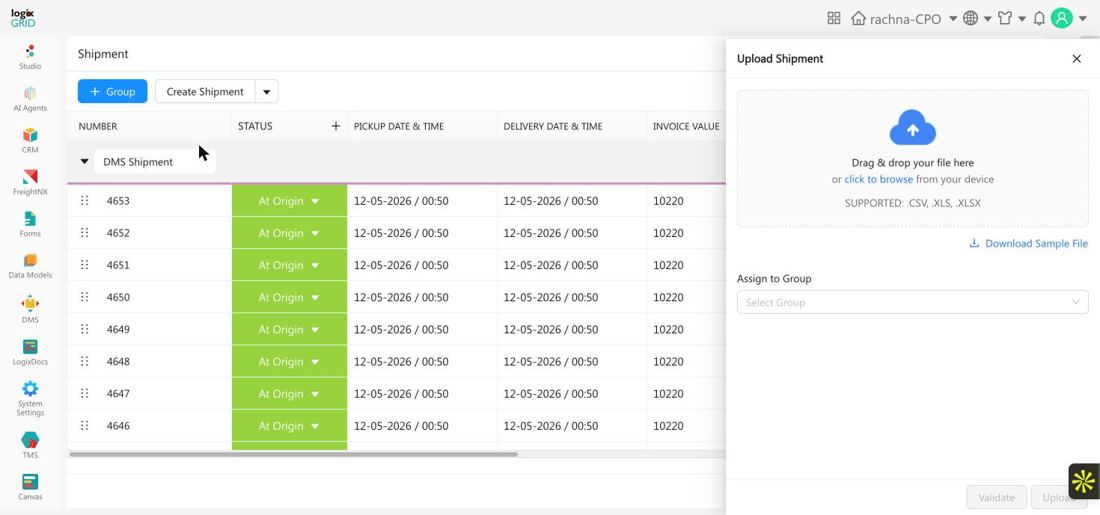
The list shows every shipment in a table, grouped under a default group. Each row shows the shipment number, its current status, pickup and delivery date and time, invoice value, and the pickup contact. Use Group to add more collapsible sections for organizing shipments — for example by zone, customer, or dispatch wave.
Step 1: Add shipments to the system
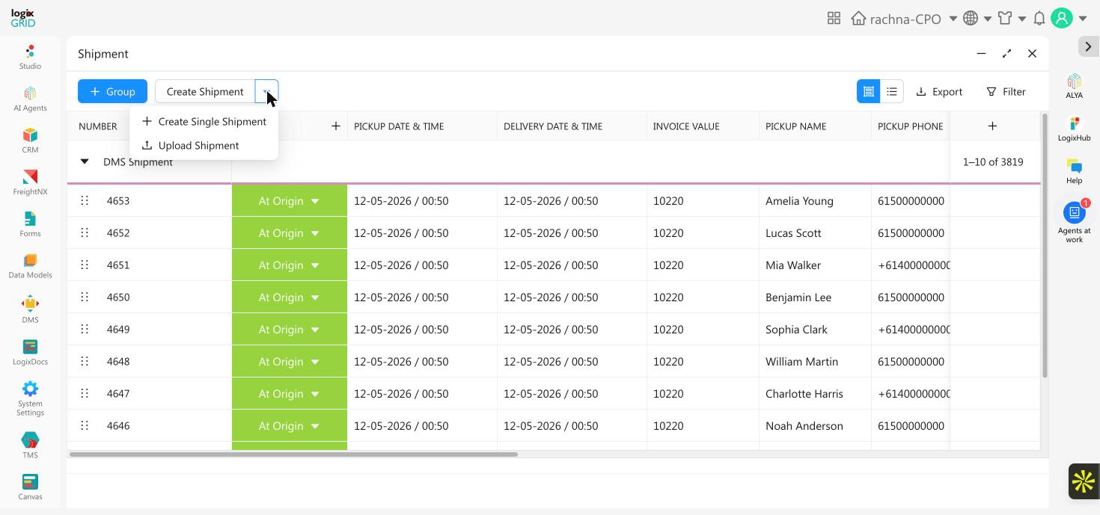
Click Create Shipment to add shipments. The dropdown next to it offers two ways to do this:
| Option | Best for |
|---|---|
| Create Single Shipment | Adding one shipment at a time, with full control over every field. |
| Upload Shipment | Adding many shipments at once from an Excel file — the faster path when a customer or courier partner sends you a batch of orders. |
Create a single shipment
- Click Create Shipment → Create Single Shipment.
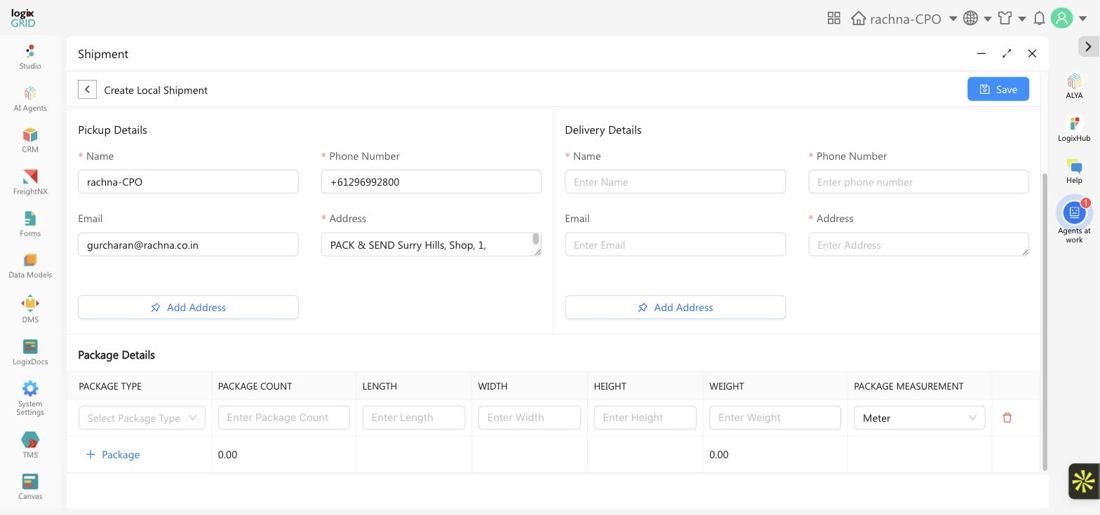
- Fill in the shipment details. The table below lists every field on the form.
- Under Package Details, click Package to add a row for each package in the shipment, with its type, count, dimensions, and weight.
- Click Save. The shipment appears in the list with status At Origin.
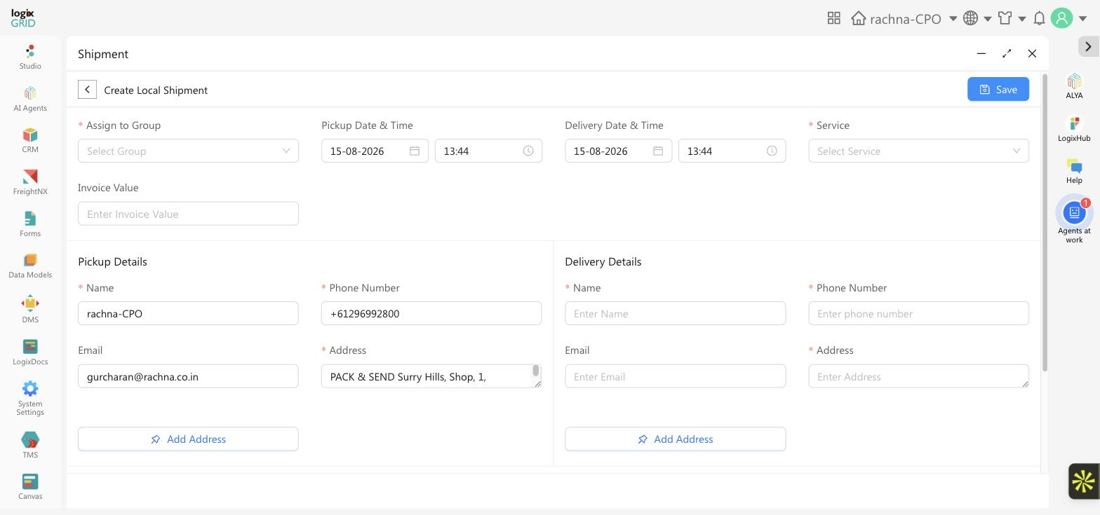
| Field | What it's for |
|---|---|
| Assign to Group | Required. Places the shipment in a collapsible group on the list, such as a dispatch wave or zone. |
| Pickup Date & Time / Delivery Date & Time | When goods should be collected and when they're expected at the destination. |
| Service | Required. The delivery product for this shipment — for example Same Day Delivery, Next Day Delivery, Luxury Day Delivery, International Shipping, or International Export. |
| Invoice Value | The declared value of the goods, used for billing or insurance context. |
| Pickup Details | Required. Name, phone number, email, and address of the party goods are collected from. Add Address pulls in a saved address instead of typing one in. |
| Delivery Details | Required. Name, phone number, email, and address of the party goods are delivered to, in the same format as Pickup Details. |
| Package field | What it's for |
|---|---|
| Package Type | The kind of packaging, for example Box. |
| Package Count | How many packages of this type and size are in the shipment. |
| Length / Width / Height | Dimensions of a single package, in the unit set by Package Measurement. |
| Weight | Weight of a single package. |
| Package Measurement | The unit for the dimension fields — for example Centimeter or Meter. |
Upload shipments in bulk
Use this when you have several shipments to add at once, such as a batch of orders from a courier partner or retailer.
- Click Create Shipment → Upload Shipment.
- If you haven't built your file yet, click Download Sample File to get a template with the correct columns.
- Drag your completed file into the upload area, or click click to browse to select it. LogixFlow accepts .csv, .xls, and .xlsx files.
- Optionally choose a group under Assign to Group so every shipment in the file lands in the same group.
- Click Validate to check the file for errors before committing it, then click Upload.
Step 2: Track shipment status
Every shipment carries a status that shows where it is in the delivery lifecycle. Click the status badge on any row to change it, or to see the full list of statuses your organization has configured. A shipment typically moves through a sequence like this:
| Stage | Common statuses |
|---|---|
| Intake | Data Received, Shipment Received, Assigned For Pickup |
| At the depot | At Origin, At Warehouse, Picked, Schedule For Dispatch, Re-Schedule |
| In motion | Out For Delivery, In Transit, Out For Port, Delivery Schedule, Delivered to Carrier |
| Completed | Delivered, Partial-Delivered, Job Closed |
| Exceptions | Un-Delivered, Cancelled, Lost, Destroyed, RTO, RTO-Delivered, Refund, Refund Made |
The exact set of statuses and their order can be configured for your organization, so the list you see may differ slightly from this table.
Step 3: View and manage a shipment
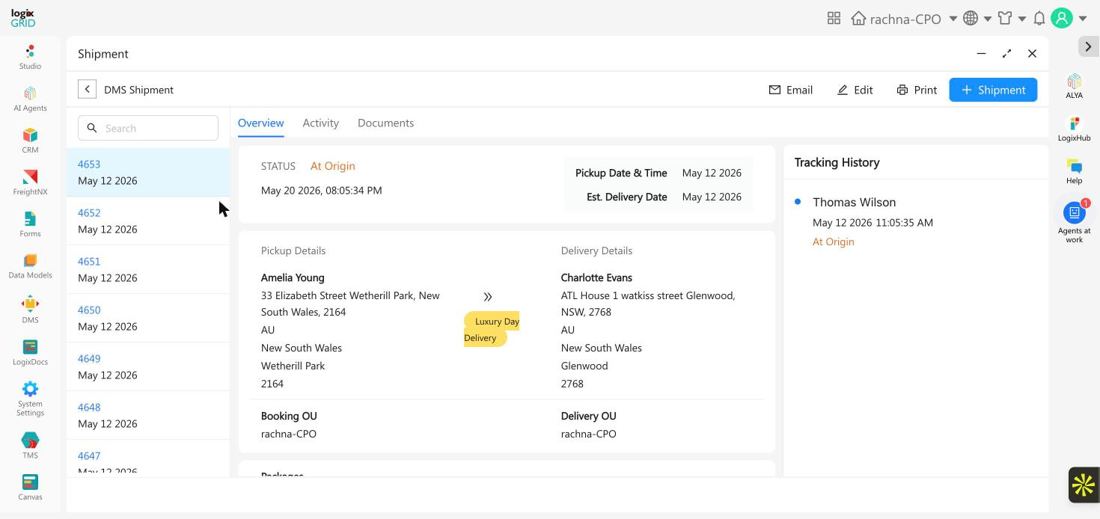
Click a shipment's number in the list to open its detail view.
| Tab | What you'll find there |
|---|---|
| Overview | Current status, pickup and delivery contact details, the assigned service, and a package breakdown. The right-hand Tracking History panel logs who moved the shipment to each status and when. |
| Activity | Notes and emails logged against the shipment. |
| Documents | Three areas: Received Documents and Sent Documents for uploading paperwork tied to the shipment, and Proof of Delivery for the signature or photo evidence captured once the shipment is delivered. |
From the detail view you can also click Email to send shipment details to a contact, Edit to change any field, or Print for a printable copy.
Finding and exporting shipments
Click Filter on the list to narrow it down by group, status, shipment number, pickup or delivery name, origin, destination, city, or pickup date range. Click Export to download the current filtered list as a spreadsheet for reporting or offline reconciliation.
What happens next: allocating shipments for delivery
Adding a shipment here doesn't move a vehicle on its own — it makes the shipment available for planning. Once shipments exist in the system, open DMS → Delivery to assign them to a vehicle and driver. From there you can either select shipments and assign them manually, or let the system run auto-allocation using your configured delivery rules. A full guide to the Delivery screen is planned as a follow-up article.
Good to know: DMS Shipment is not the same as FreightNX Shipment (freight-forwarding jobs) or TMS Shipment (transport shipments). All three use the word "Shipment" for a different kind of job, so if a workflow doesn't match what you see here, confirm you're in the right module first.