Please select an article from the left menu to display its content.
Delivery is where DMS shipments get planned onto vehicles and drivers. Once shipments exist — created manually or uploaded in bulk on the Shipment screen — they sit in an unallocated pool here until you assign them. You can select shipments and assign them by hand, or apply a Rule Engine policy so only qualifying vehicles and drivers are offered for a given batch. After assignment, each vehicle's route becomes a delivery run sheet you can review, download, or print.
Getting to Delivery
- In the left sidebar, click DMS. A popup opens with the DMS screens.
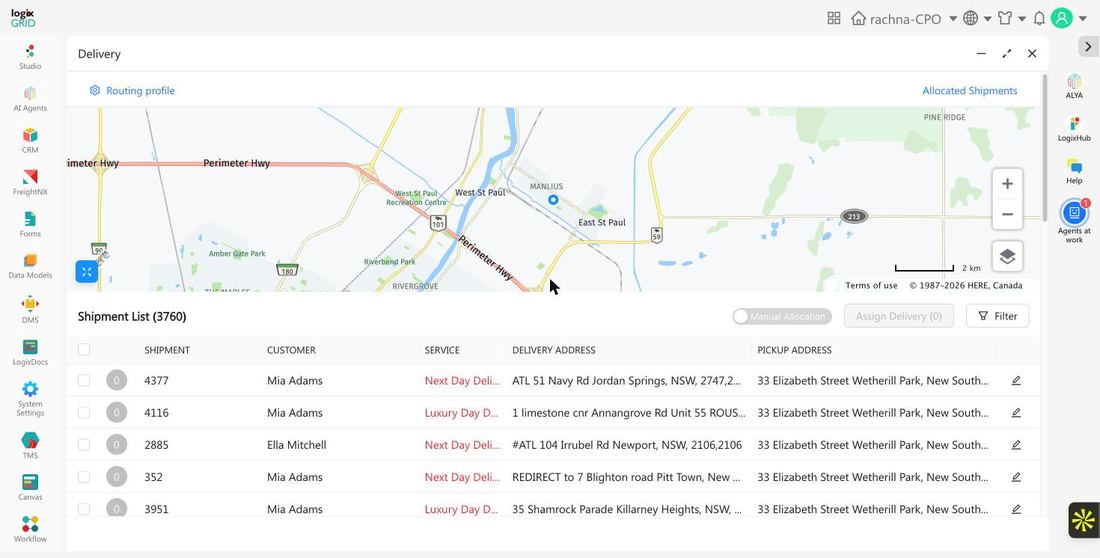
- Click Delivery. LogixFlow opens the shipment pool on a map.
The map shows the pickup and delivery geography for the current pool. Below it, Shipment List shows every unallocated shipment with its number, customer, service, delivery address, and pickup address. Routing profile (top left) and Allocated Shipments (top right) are always available from here.
Step 1: Narrow the pool (optional)
If the pool is large, click Filter to narrow it by Booking Zone or Delivery Zone, or check No zone to see shipments that aren't assigned to either. Click Search to apply, or Reset to clear.
Step 2: Select shipments to plan
Check the box next to each shipment you want to plan. Selected shipments are numbered and pinned on the map, and the shipment count updates next to Assign Delivery.
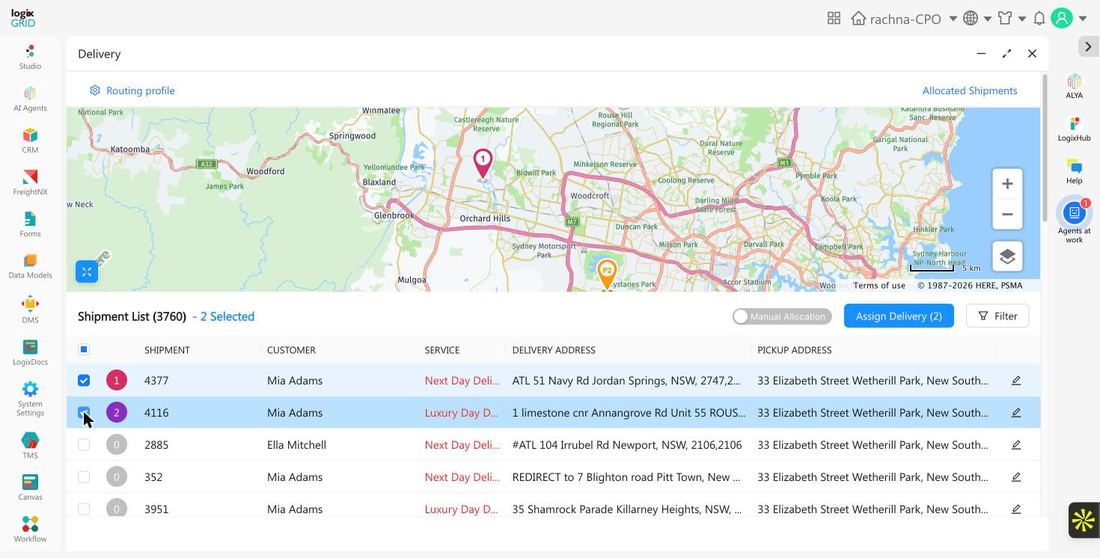
Turn on Manual Allocation if you want to control vehicle assignment yourself for this batch rather than relying on suggested vehicles.
Step 3: Assign the delivery
- With shipments selected, click Assign Delivery.
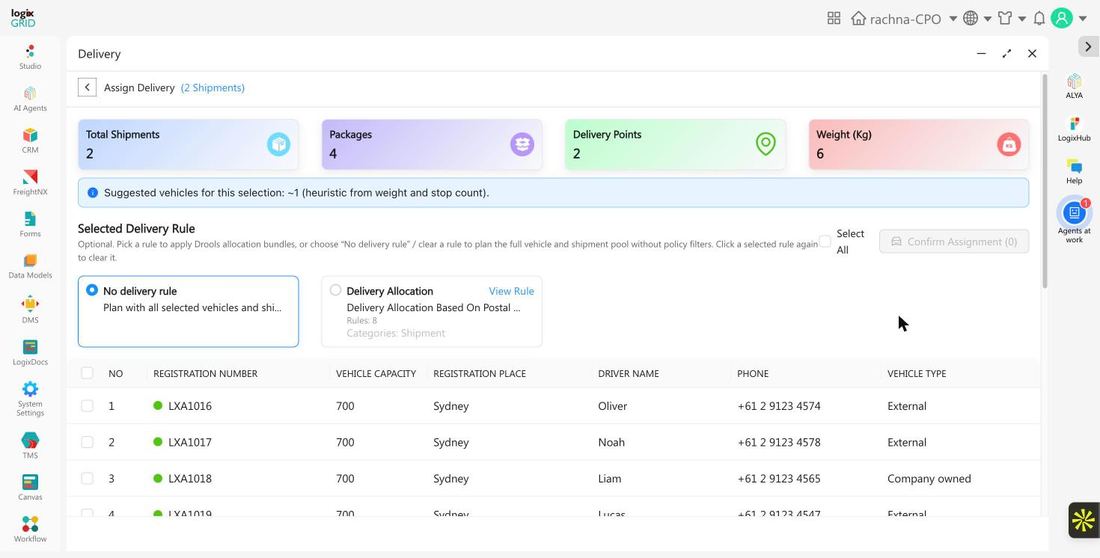
- Review the summary cards — Total Shipments, Packages, Delivery Points, and Weight (Kg) — and the suggested vehicle count based on weight and stop count.
- Under Selected Delivery Rule, optionally pick an active rule from Rule Engine to filter the vehicle list to only qualifying vehicles and drivers, or leave No delivery rule selected to see the full pool. Click View Rule to review a rule's conditions first.
- In the vehicle table, check the vehicle (or vehicles) to assign. Each row shows registration number, capacity, registration place, driver name, phone, and vehicle type. Use Select All to check every vehicle currently listed.
- Click Confirm Assignment.
Step 4: Review allocated runs
Click Allocated Shipments from the Delivery screen to see confirmed runs, grouped by delivery run sheet number. Each group lists its assigned vehicle, vehicle type, driver, total distance, duration, and stop count.
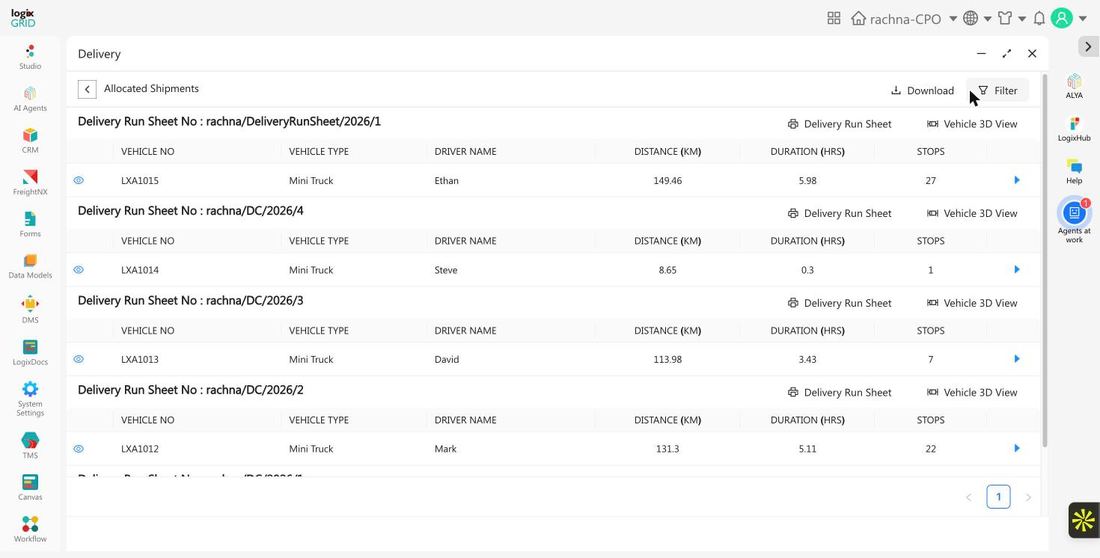
From here you can click Delivery Run Sheet on a group to open its printable run sheet, or Vehicle 3D View to see the route visualized. Use Download to export the allocated list, and Filter to narrow it down. Click the arrow on a vehicle row, or the eye icon, to drill into that run's linked shipments and stop sequence.
What happens before this: registering shipments
Delivery only works with shipments that already exist in the system. If the pool is empty or missing jobs you expect, go to DMS → Shipment to add them, either one at a time or by uploading an Excel file.
Good to know: DMS Delivery is not the same as TMS Delivery or TMS Indent, which plan transport shipments in a different module. If a workflow doesn't match what you see here, confirm you're in DMS and not TMS.