Please select an article from the left menu to display its content.
Rule Engine is DMS's delivery-allocation rulebook. Each rule pairs a set of shipment conditions with a set of vehicle-and-driver filters, so that when you plan deliveries, matching shipments only get offered vehicles or drivers that fit your policy — for example, sending shipments in a certain postal code to a dedicated fleet, or keeping luxury deliveries on approved vehicles. Rules created here become selectable when you assign deliveries on the DMS → Delivery screen.
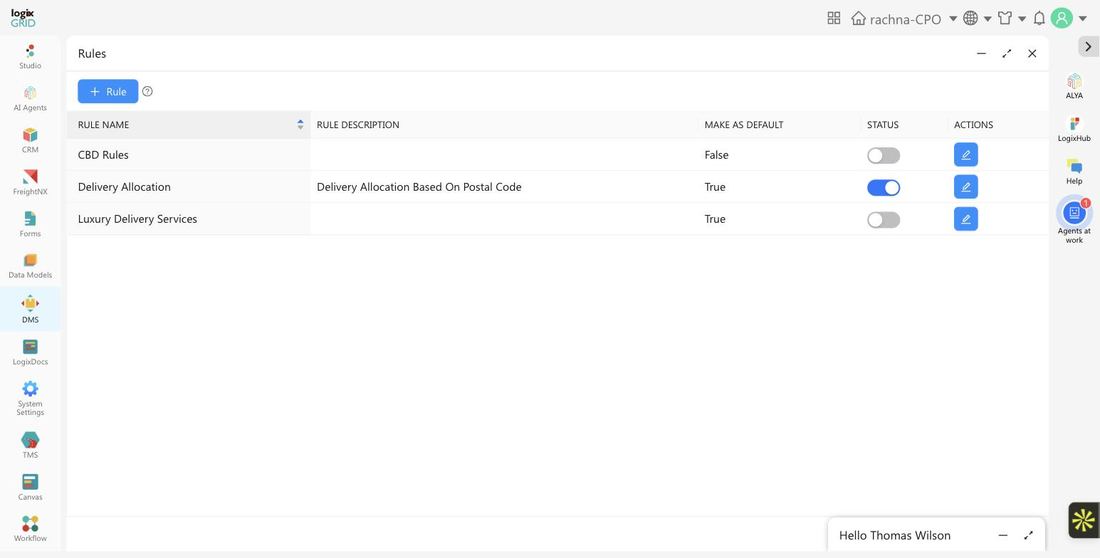
Getting to Rule Engine
- In the left sidebar, click DMS. A popup opens with the DMS screens.
- Click Rule Engine. LogixFlow opens the rules list.
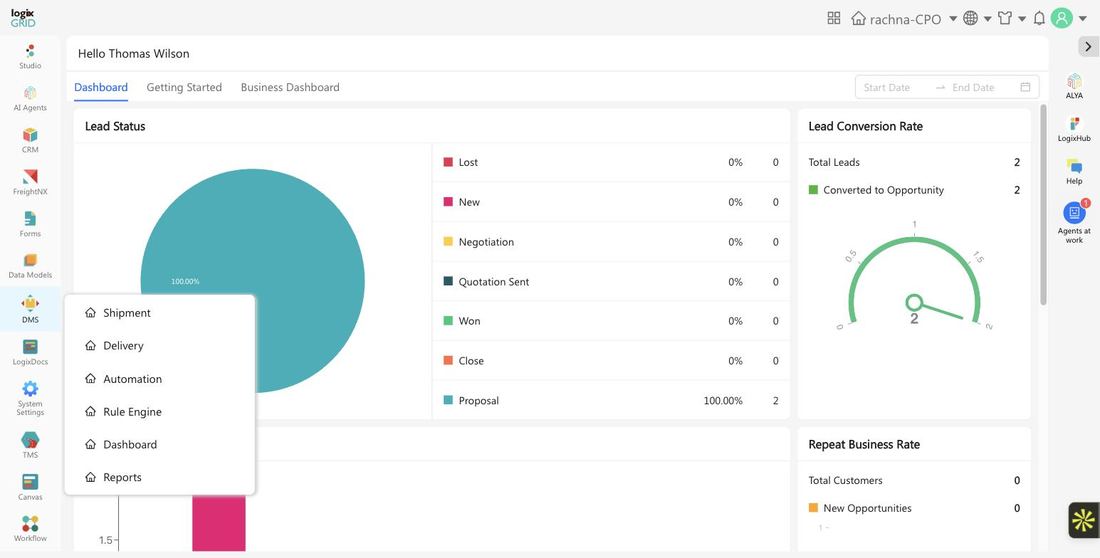
The list shows every rule you've defined, with its description, whether it's marked as the default, and whether it's currently active.
| Column | What it's for |
|---|---|
| Rule Name | The rule's identifier. Click the column header to sort the list. |
| Rule Description | A short note on what the rule does — useful when you have several rules covering different regions or delivery types. |
| Make As Default | True if this rule is offered automatically when planning deliveries. |
| Status | Toggle a rule active or inactive without deleting it. Only active rules are available to select when assigning deliveries. |
| Actions | Click the pencil icon to edit a rule's conditions and filters. |
Step 1: Create a rule
- Click + Rule.
- Enter a Rule Name. This is required.
- Optionally choose a Delivery Type — Dedicated Transportation or Multi-Stop Delivery — to scope the rule to that kind of delivery.
- Optionally add a Description to help you and your team tell rules apart later.
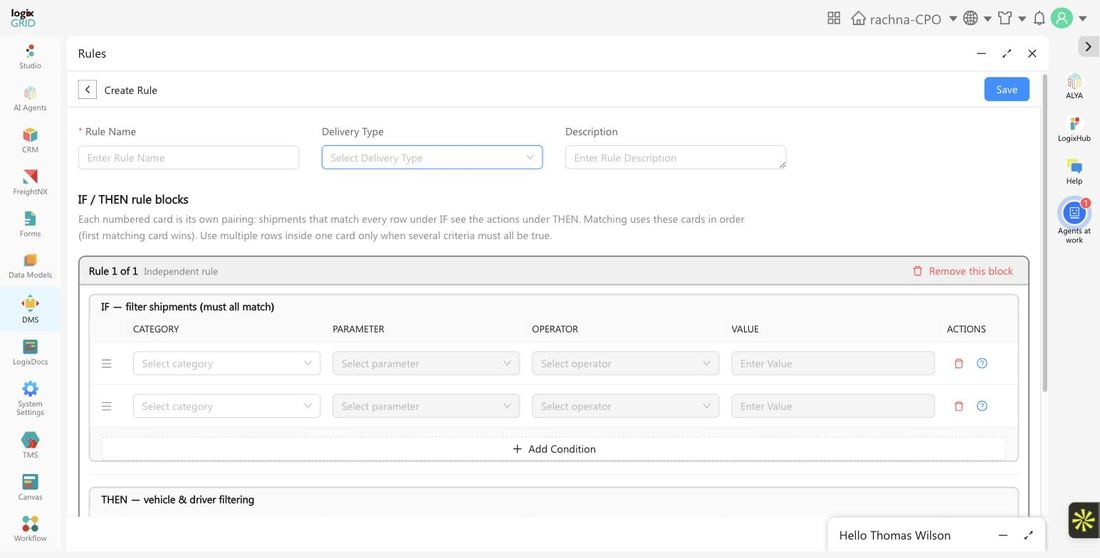
Step 2: Build the IF/THEN rule block
Below the header fields, every rule has at least one numbered IF/THEN card. Shipments that match every row under IF are offered only the vehicles and drivers described under THEN. If a rule has more than one card, LogixFlow checks them in order and stops at the first card that matches — so put your most specific conditions first.
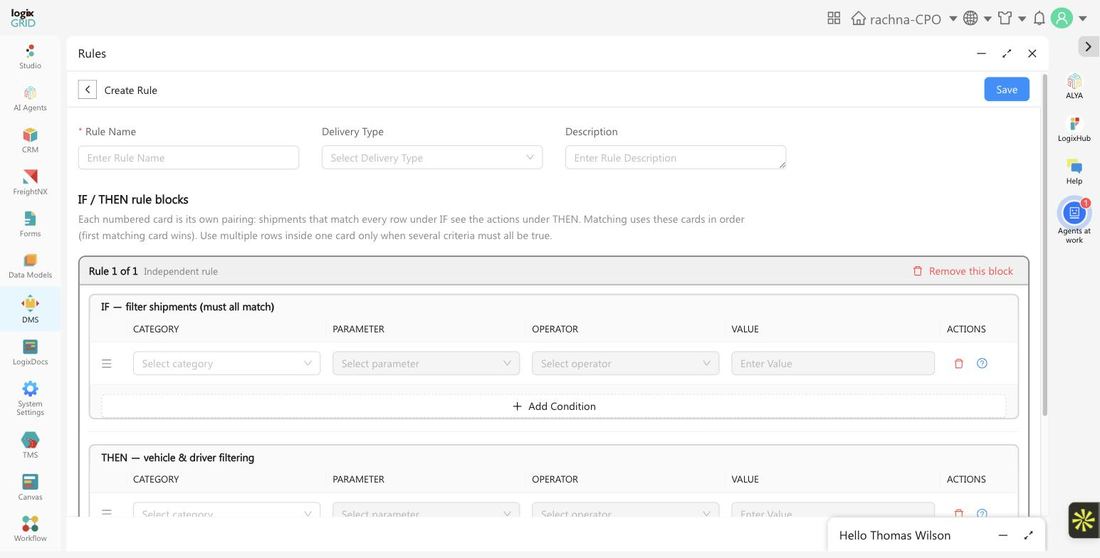
- Under IF — filter shipments (must all match), choose a Category (currently Shipment), then a Parameter, Operator, and Value to define one condition. Click Add Condition for additional rows — every row in the card must match for the card to apply.
- Under THEN — vehicle & driver filtering, add one or more rows the same way to describe which vehicles or drivers qualify. Click Add Action for more rows.
- Click Add another IF/THEN rule block if you need a separate condition-and-filter pairing, for example a fallback rule that applies when the first card's conditions aren't met.
- Click Save.
Managing rules
Use the Status toggle on the list to activate or deactivate a rule without deleting it, and Make As Default to mark the rule that should be offered first when planning deliveries. Click the pencil icon under Actions to reopen a rule and adjust its header fields or IF/THEN blocks.
Using a rule when you assign deliveries
On DMS → Delivery, after selecting shipments and clicking Assign Delivery, the Selected Delivery Rule section lists your active rules alongside No delivery rule. Choosing a rule filters the vehicle list below to only those vehicles and drivers your IF/THEN blocks allow for the selected shipments; choosing No delivery rule plans against the full vehicle and shipment pool with no policy filtering. Click View Rule next to a rule to review its conditions before applying it.
Good to know: This is DMS Rule Engine (/dmsRule), which controls shipment-to-vehicle allocation. It's a different module from Studio Rule Engine, which controls field visibility, requirements, and values on a Studio app's forms. If a workflow doesn't match what you see here, confirm you're in DMS and not inside a Studio app's Design tab.